rani799ah@gmail.com

Showing posts with label vegetarian. Show all posts

Vegetable Pasta in Spicy Malai Sauce

Now a days pasta is one of the comfortable food for all. A big bowl of pasta with rich creamy sauce and the addition of mixed vegetables is a perfect and easy choice for dinner. Here is a quick and delicious recipe of creamy vegetable pasta in spicy and rich thick coconut milk sauce (malai sauce).
Ingredients:
  1. Pasta-1 cup
  2. Butter-2 tbsp
  3. Thinly chopped garlic-1 tbsp
  4. Thinly chopped onion-1 
  5. Chilly powder-1 tsp
  6. Pepper powder-1/4 tsp
  7. Cumin powder-1/4 tsp
  8. Salt-to taste
  9. Chopped carrot-1/4 cup
  10. Green pea-1/4 cup (fresh / or cooked dried)
  11. All purpose flour (maida)-1 tbsp
  12. Thick coconut milk- 3/4 cup
  13. Chopped cilantro/ basil leaves- to garnish
Preparation:
  • Cook pasta in enough boiling water by adding salt until done (8-10 minutes).
  • Drain it and keep aside.
  • Heat butter in a pan; add thinly chopped garlic and onion; saute for a minute.
  • Add chilly powder, pepper powder and cumin powder .
  • Add chopped carrots and green pea; saute 3-4 minutes.
  • Then add all purpose flour and mix well on low flame for two minutes.
  • Add thick coconut milk in to it and stir well.
  • Cook on medium flame until the mixture starts thickening.
  • When it starts thickens; add enough salt and cooked pasta in to it.
  • Mix well and switch off the flame.
  • Add in to serving plate, garnish on top with chopped cilantro and serve warm.

Sooji Dhokla


Dhokla is a staple vegetarian food originated from the Indian state of Gujarat. Normally it is made with the fermented batter from rice and split chick peas. Here is an easy and instant version of dhokla using sooji. The nice, spongy and savory sooji cake is absolutely delicious and and serve it along with mint chutney or itself.


Ingredients:
  1. Semolina (sooji/ rava)-1 cup
  2. Ginger paste- 1/2 tsp
  3. Green chilly paste- 1/4 tsp
  4. Asafoetida (hing powder/kayam)- a generous pinch
  5. Curd-1 1/2 tbsp( or lemon juice-1 tsp)
  6. Salt-to taste (little)
  7. Water-to make a batter
  8. Eno/ Fruit salt- 1 1/2 tsp
For Seasoning:
  1. Oil- 1 1/2 tbsp
  2. Mustard seeds-1 tsp
  3. Curry leaves-2 spring
  4. Powdered sugar-1 /4 tsp
  5. Grated coconut-1 tbsp
Preparation:
  • Grease a steaming pan with 1/4 tsp of oil and keep it ready.
  • In a large mixing bowl; mix sooji (semolina) with ginger, garlic, turmeric powder, hing, salt and curd.
  • Mix well and add water little by little to make smooth batter (little thick but running consistency like dosa batter).
  • Now heat a steamer with water and switch on the flame.
  • Place the greased pan on top.
  • Now add eno to the sooji batter mix and give a quick good mix. Then the batter gets bubbled and increase the quantity.

  • Quickly pour the batter in to greased pan.
  • Cover the pan and cover the steamer also.
  • Cook for about 20 minutes (insert a skewer and check whether it comes out clean; if not cook for few more minutes).
  • After cools down; (run a sharp knife through the sides) invert the cooked dhokla in to a serving pan
  • Do seasoning on top.
  • Heat a pan with oil; splutter mustard seeds followed b;y curry leaves, green chilly and grated coconut.
  • Cut the dhokla in to square pieces and spread the seasoning on top along with powdered sugar.
  • Serve warm and enjoy the great taste!!
Note:
  • As soon as adding eno; don't mix the batter too much; and quickly add to the steaming pan. there must be no lumps in the batter.
  • Dont' over cook. As the spongy text gets harden .

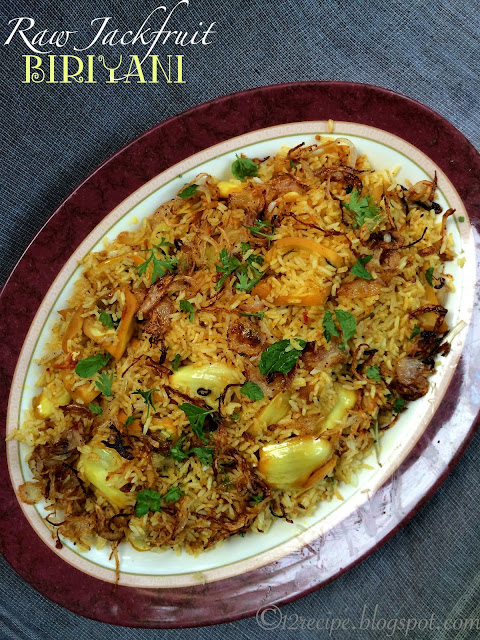
Raw Jackfruit Biriyani


Jackfruit biriyani (kathal biriyani) is a mildly spicy and aromatic rice preparation in which the delicious raw jackfruit gravy is topped with basmati rice. It is prepare like the normal dum biriyani method and of course a great treat for the veggies.
Ingredients:
  1. Tender Raw Jack-fruit- 1/2 kg 
  2. Onion-2 nos
  3. Tomato-1 large
  4. Ginger garlic paste-1 tbsp
  5. Green chilly slit-2 nos
  6. Turmeric powder- 1/2 tsp
  7. Chilly powder-1 tsp
  8. Coriander powder-1 tsp
  9. Garam masala powder-1 tsp
  10. Chopped coriander leaves- 1/4 cup
  11. Chopped mint leaves- 1/4 cup
  12. Thick curd- 1/2 cup
  13. Salt-to taste
For Cooking rice:
  1. Basmati rice-1 cup
  2. Cardamom-2 nos
  3. Clove-3 nos
  4. Bay leaf-1
  5. Cinnamon-1 small stick
  6. salt-to taste
Other Ingredients for garnishing:
  1. Fried onion-1
  2. Fried cashews-few
  3. Fried raisins-few
  4. Coriander leaves-few
  5. Mint leaves-few
  6. Kewra water / pineapple essence- few drops
  7. Ghee-1 tbsp
Preparation:
  • Chop the tender jackfruit in to small pieces (by discarding its outer green skin and seeds).
  • Wash them properly and drain it.
  • Heat a pan with oil; saute onions until transparent.
  • Add ginger garlic paste  and green chilly slit; saute for a minute.
  • Add tomato chopped and saute until mashed well.
  • Add all the powders along the jackfruit pieces; mix well.
  • Stir cook for about 8-10 minutes on low falme.
  • After that add curd; mint leaves and coriander leaves,
  • Mix well and cover cooks it on medium flame for another 10-15 minutes or until the jackfruits get cooked well and gravy thickens.(Meanwhile prepare the rice.)
  • Boil 4 cups of water by addind cardamom, clove, bay leaf, cinnamon and enough salt.
  • When it boils add washed (and drained) basmati rice and cook until done.
  • Drain the cooked rice.
  • Add it on top of the prepared jack fruit masala.
  • Above that spread the garnishing ingredients.
  • Cover the lid tightly and slow cook it for about 15 minutes in simmer mode.
  • Switch off the flame and rest for another 10 minutes.
  • Open the lid and give a nice mix.
  • Serve hot with  raitha and pickle!!!

Tender Mango Pickle


The mango season has been started and the tiny mangoes are falling down.. Pick them up and do pickling. Here is an easy and finger licking tender mango pickle recipe using my Homemade Pickle Powder!!!

Ingredients:
  1. Tender mangoes- 1/2 kg
  2. Mustard oil ( gingelly oil/ sesame oil)- 1/2 cup
  3. Mustard seeds-1 tsp
  4. Thinly chopped ginger-2 tbsp
  5. Thinly chopped garlic-2 tbsp
  6. Thinly chopped green chilly-2 tbsp
  7. Curry Leaves-3 springs
  8. Pickle powder-5 tbsp
  9. Salt-to taste
  10. Vinegar-1 cup
Preparation:
  • Cut the tender mangoes in to two or three pieces (depending on its size up to 4 pieces; disacrd its seed).
  • Heat oil in a pan; splutter mustard seeds
  • Add chopped ginger, garlic and green chilly. Saute for a minute,
  • Add curry leaves, pickle powder in low flame and then add vinegar.
  • When it boils add mango pieces and salt.
  • Cook for about 5 minutes and switch off the flame.
Note: If you want more gravy for your pickle; you can add 1/2 cup of hot water along with the vinegar. Then you need to store the pickle in fridge for long. Otherwise consume it within one week.
              Green Apple Pickle
              Tamarind Pickle

Mango Thokku


The mango season has started and raw mangoes are available in everywhere. Mango thokku is an instant version of mango pickle. It can make within few minutes and of course finger licking too..
Ingredients:
  1. Raw mango-3 large
  2. Oil- 1/4 cup (use mustard oil or gingelly oil for great taste)
  3. Mustard seeds- 1 tsp
  4. Fenugreek seeds (methi seeds/uluva)- 1/4 tsp
  5. Turmeric powder- 1/2 tsp
  6. Chilly powder-3 tbsp (increase as per your spice tolerance)
  7. Hing powder (kayam/ asafoetida)- two pinch
  8. Salt-to taste (little more than normal salt level)
  9. Curry Leaves-2 spring
  10. Grated Jaggery-2 tbsp (or more)
Preparation:
  • Peel the skin of raw mangoes and grate them finely using a carrot grater.
  • Heat oil in a pan; when it is hot crackle mustard seeds and then fenugreek seeds.
  • Make the flame low and add grated mangoes, turmeric powder, chilly powder, salt, hing, grated jaggery and curry leaves.
  • Cook on medium flame for about for few minutes (about 5-6 minutes) until oil floats on top.
  • Switch off the flame and allow to cool.
  • After cools down completely; you can store them in an airtight container for long use.

Note:
Use dry spoon for picking the pickle; then It will stay fresh for a week in normal temperature
and in fridge for about one month.

Cococnut Rice

 Coconut rice is one of the most simple pulao in which the cooked rice is tempered with freshly grated coconut. The nice and rich aroma of coconuts and curry leaves makes the rice really flavorful.
Ingredients:
  1. Cooked rice-2 cup (basmati rice or white any white rice)
  2. Coconut oil-2 tbsp
  3. Mustard seeds-1/4 tsp
  4. Cumin seeds- 1/2 tsp
  5. Urad dal- 1/2 tsp
  6. Roasted chana dal-1 tbsp
  7. Roasted peanuts-1 tbsp
  8. Curry leaves-2 springs
  9. Dry red chilly splitted-2 numbers
  10. Freshly grated coconut-3/4 cup
  11. Salt-to taste
Preparation:
  • Heat coconut oil in a pan; splutter mustard seeds followed by cumin seeds.
  • Add urad dal, chana ldal and pea nuts.
  • Add dry red chilly and curry leaves.
  • Add grated coconut and salt; roast in slow flame for a minute.
  • Add the cooked rice in to; mix well for a minute and serve hot with the choice of your curry; pickle or along with raitha!

Note: You can also use frozen grated coconuts; if fresh one is not available.
          Use the choice of  nuts for seasoning.

Jeera-Aloo (Cumin-Potato) Stir Fry


A very simple, delicious and aromatic side dish. Cumin and potato together brings out the best combo and anything can suit with it.

Ingredients:
  1. Potato chopped (lengthwise or cubed)-2 cup
  2. Mustard seeds- 1/2 tsp
  3. Cumin-1 1/4 tsp
  4. Oil-2 tbsp
  5. Curry leaves-2 springs
  6. Dry red chilly-2 nos
  7. Turmeric powder- 1/4 tsp (optional)
  8. Chilly powder-1 tsp
  9. Hing (asafoetida/kayam)-2 pinch
  10. Salt-to taste
Preparation:
  • Heat oil in pan; when it is hot make the flame to low;crackle mustard seeds followed by cumin seeds; 
  • Add dry red chilly and curry leaves.
  • Add all the powders and potato pieces; mix well.
  • Cover cooks it for about 15 minutes on low flame by stirring occasionally(or cook until potato pieces get cooked well; no need to add water; if necessary; sprinkle little).
  • Switch off the flame and serve hot..

Lemony Lentil Soup


Lentil soup is what's for lunch today. I make this soup often. It's rustic and easy to prepare. The nutritional profile is wonderful. Best of all, the lentils remain whole and keep their firm texture. This is a brothy lentil soup. A smoked-paprika scented stock is infused with the earthy flavor of the lentils. The soup is finished with lemon and dill. Fresh dill is one of my favorite herbs. The bright and citrusy flavor of dill counters the richness of the lentils. Spinach is stirred in at the end of cooking to remain vibrant and green. Lots of freshly cracked black pepper is welcome here too.  

I typically make this soup in the morning. It reheats well. After a long walk on the beach, I warm some pita in the toaster oven and heat the soup for lunch or a light dinner. I always keep pita bread in my freezer because I'm half Lebanese. Round out this meal with olives, marinated artichokes and/or some roasted red peppers to stuff into the pita. Alternately, you can serve the soup with steamed rice for a complete protein.


Lemony Lentil Soup 

Makes A Pot Full 

Some Notes

The spices are kept subtle in this soup. Feel free to add more cinnamon and cumin if you're in the mood for something assertive. Think of this soup as a base recipe and use your favorite spices. Instead of smoked paprika, garam masala or curry powder will work here too.

Make sure you rinse the leeks well. If you don't have leeks, swap them for a large onion or a few shallots.

Secret Ingredient Alert: Rapunzel No Salt Vegan Vegetable Bouillon is my go-to veggie bouillon when I don't have the time or energy to make my own stock. It's the best! I love it for its clean taste and homemade flavor. I find it at Whole Foods or often buy it in bulk online at Amazon. It's a lifesaver for quick soups like this one. But you can swap it and the water for 10 cups of your favorite broth or stock.

Ingredients

  • 1 cup of green lentils (I use Whole Foods 365 Organic Brand)
  • 2 carrots, chopped
  • 3 celery stalks, chopped
  • 2 leeks, white and light green parts, chopped
  • 2 cloves of garlic, crushed, pressed or chopped  
  • A handful or two of baby spinach (optional) 
  • A handful of fresh dill, chopped 
  • 1-2 lemons
  • 1 1/2 teaspoons of smoked paprika 
  • 1/4 teaspoon of ground cinnamon
  • 1/2 teaspoon of ground cumin
  • 5 vegetable bouillon cubes. I use Rapunzel No Salt Vegan Vegetable Bouillon. (see notes) 
  • Salt and pepper to taste. I use sea salt and freshly cracked pepper

Serving Suggestions
pita bread
steamed rice
naan
paratha
chapati
roti
baguette
a dollop of yogurt or creme fraiche
Some toasted slivered almonds


Instructions

In a large soup pot add the green lentils, carrots, celery, leeks, garlic, smoked paprika, cinnamon, cumin and bouillon cubes. Stir in ten cups of water. Salt to taste. Cover the pot and bring to a boil. Turn down the heat and simmer until the lentils and vegetables are soft. Take the soup off the heat. Stir in the baby spinach (if using), a good squeeze or two of fresh lemon juice, the chopped dill and some cracked black pepper. Stir the spinach around until it wilts from the heat of the soup. Serve with any of the above suggestions.

Bon Appetite & Blessings!
xx ~ Jilly
 

Kookoo Khorfeh - Purslane Kookoo


Every year from mid spring to late summer I eagerly await the appearance of dark-green خرفه (purslane) sprouts in my backyard, vegetable garden, flower borders and in between the cement cracks. The often under-appreciated and ignored purslane has always been a favorite of mine. You can throw a handful of fresh purslane in almost any dish and make it taste better with its slightly tart and

Easy week-night greens


I read this article in The Guardian the other day and thought that Eliane Glaser had a very good point. Sure, celebrity chefs do live in a bubble, and their culinary advice, as healthy and tasty and wonderful as they might sound, aren't always practical. But I work full time, I have two young kids, an overworked partner, no one around to give us a hand, and yet we cook dinner from scratch every single night. The kids and I get home at 6:30pm every week night and we are ready to eat dinner by 7:15. Dinners consist of freshly cooked vegetables, usually served with meat or fish (the type of recipes you read on this blog), then a dairy product (yogurt or cheese), and a fruit. Most nights we start with a salad or soup (made from scratch as well, including dressing). (For drinks: water.) So I know there is a way to eat healthy food even on a tight schedule, and I know that the food revolution isn't just a great big fat lie.

Well, that was my conclusion two weeks ago. Yesterday, I took this quiz by Charles Murray, on NPR.org, and had to admit that I, too, live in a pretty thick bubble. Hm... So... Err... Take my advice with a grain of salt ;-)

Here is one of my new week-night favorites. It works well aside grilled meat, baked fish, or a starchier vegetable dish (which can be as simple as boiled potatoes).

Serves 4

  • 1 Tbsp olive oil 
  • 1/2 yellow onion, coarsely chopped 
  • 2 cloves garlic, halved and stemmed 
  • 2 bunches swiss chards, or 1 bunch swiss chards and 1 bunch collard greens, or any other combination of green-leafed vegetables 
  • 2 Tbsp sun-dried tomatoes in olive oil, cut into strips 
  • salt, freshly ground black pepper 
  • 1 tsp whole coriander seeds, crushed, or 1/2 tsp coriander seed powder 
  1.  If you use swiss chards and the stems are large enough, use them. 
    • Cut off the leaves close to the stem and reserve. 
    • Cut the base of each stem without detaching it completely, and pull the fibers that come off. 
    • Cut the stem again, 2 inches away from its base, starting from the other side of the stem, and pull off the fibers again. Repeat until you reach the tip of the stem. 
    • You are left with 2-inch strips of delicious stem, free of the extra fibers that would make them chewy.
    • Chop the stem strips. 
  2. Wash the stemmed leaves and drain them the way you would wash and drain lettuce leaves. Take a few leaves at a time, roll them together along their longer axis, and cut into 1-inch strips. 
  3. Heat up the olive oil in a sautee pan. Add the chopped onion, chard stems and garlic and sautee until translucent (1-2 minutes). 
  4. Add the greens and toss until all the leaves are wilted, but still bright (another 1-2 minutes). 
  5. Toss in the julienned dried tomatoes and seasoning. Serve immediately. 
Step 3 (with green onions instead of yellow, here)

Pear-almond tart

I brought dessert to a party a couple weeks ago and everyone asked for the recipe, so here it is. :-)


For a 10" tart (plus some left-over pastry):

  • 1 egg
  • 1/2 tsp salt
  • 125g sugar
  • 250g flour
  • 125g butter
  • 2 or 3 ripe pears (d'Anjou or Bartlett)
  • ground cinnamon
  • almond powder or thin almond slivers (optional)

Prepare the pâte sablée pastry as follows:
  1. Beat the egg, salt, and sugar in a large bowl, using a wooden spoon, until they become foamy and turn to a pale yellow. (Note: why use a stand mixer when you can have a free workout?)
  2. Sift all the flour at once over the egg and sugar mix. Start mixing slowly with the wooden spoon, then use your fingers to mix all the ingredients. Rub small amounts of dough between your fingers or hands to turn the mix into a grainy "sand." (Pâte sablée means "sanded dough.")
  3. Cut the butter into small parcels. If the butter is very cold, heat up in the microwave for a few seconds. Add to the mix and knead the dough with your hands very briefly, then form a ball. The dough should come off of your hands easily (add a little bit of flour if needed), but it remains a little sticky.
  4. (If the dough feels really soft, or you are making this recipe on a hot summer day, or in a warm kitchen, you may want to cool down the dough in the fridge for a while. This step is optional.) 
  5. Roll out the pie crust on floured parchment paper down to 3-4 mm in thickness. Press into the bottom of a 10" pie dish (mine is metallic). Punch a few holes in the crust with a fork.
  6. Bake the crust at 350ºF (180ºC) for about 15-20 minutes. It should remain pale.

Cut two ripe, juicy pears into quarters. D'Anjou and Bartlett (Williams) work great for this. Peel and core, then slice thinly. Arrange the pear slices on the pre-baked pie crust, either in circles on in rows.

Dust with cinnamon (just a tad), then add a few tiny bits of butter and optionally sprinkle with almond powder (1-2 TBSP) or almond slivers. Bake for about 10 minutes at 350ºF (180ºC).


I brought a 10" tart to the party, but for the picture, I made the same recipe again, using my daughter's bakeware: mini pie dish, mini utensils... And we made animal cookies with the rest of the dough. They were delicious.


I accidentally made my best crepes ever


It was last weekend, a few days after la Chandeleur, the French "crepe day." I had made the batter around 4pm on Saturday, thinking that we would have the crepes for dinner that evening. Since the batter needs a couple hours of rest at room temperature, I left it on the kitchen counter while we visited our new friends, a family we met through preschool. But kids and parents alike had such a good time that we decided to end the day at the restaurant all together. I figured that the crepes could wait another day. On the way back from dinner, I put the bowl of batter in the fridge until Sunday's lunch. And what a lunch we had!

Making crepes is a bit like making jam, as far as I'm concerned: as simple as the recipe might be, something always goes wrong, and I never know what it is. Crepes end up being too thick, jam overcooks... It's an art much more than it is a science. Successes always seem like miracles. 

On Saturday, although I always prepare the batter with a wooden spoon and a manual whisk (and a fair amount of elbow grease), I decided to try using my shiny but seldom used stand mixer for a change. I weighed the flour into the mixing bowl, pushed the flour to the sides and added the beaten eggs in the center, then mixed a bit with a wooden spoon (see, I can't help it), letting the flour fall in little by little. I added the milk, oil, and salt. Then off to the mixer, on slow rotation, with the wire whip attachment (rather than the flat beater). After a minute or two, the batter was homogeneous. I then slowly poured in a bottle of beer and let the mixer do its magic for another couple of minutes. I covered the bowl of batter with a sheet of paper towel and let it stand at room temperature for roughly 5 hours, then in the fridge for another 15 hours or so. Did the extra night of fermentation do the trick? Was the mechanical whisking more efficient than the manual? Did I use more liquid than usual? Was it wiser to use a paper towel than a kitchen cloth? I don't really know.

When I took the bowl out of the fridge, the batter was quite liquid—something my cookbook said I didn't want. But the crepes ended up being perfect : thin and fluffy. They reminded me of the marvelous crepes I devoured in Brittany as a kid. (Brittany is where crepes originated. Bretons make their crepes very thin, almost like dentelle (lace), another of their renowned specialties.) But they also had that subtle fermented taste of South-Indian dosas (which are made of fermented rice and lentil flour). A great combination.

After a few savory crepes filled with French ham, mushrooms (sautéed in butter) and grated Emmentaler, I spread another one with redcurrant jelly, which I just happened to find in a gourmet store. This long forgotten taste brought me right back to my grandmother's house. She had several bushes of redcurrants in her backyard, and we would help her harvest les groseilles every year. She would make the most delicious jelly, in a giant copper pan (bassine a confiture), and covered each jar with a paper soaked in paraffin wax for better preservation, so we could enjoy the jelly all year round.

What a pleasure to accidentally make crepes that would remind me of such fond memories.

For 12 large crepes, 2 hours to 1 day in advance:
  • 250 grams flour 
  • 3 whole eggs, beaten
  • 1/4 liter whole milk
  • 3 tablespoons sunflower oil
  • 2 or 3 pinches (about 1/2 teaspoon) salt
  • 11.2 oz (one bottle, about 1/3 liter) Kronenbourg 1664 beer, a pale lager from Alsace, or any other mild-tasting beer
  1. Mix all the ingredients slowly, in the order of the above list, until obtaining a smooth and runny (but not totally liquid) batter. 
  2. Let the batter rest at room temperature for at least 2 hours, covered with a paper or kitchen towel, then optionally in the fridge for up to a day.
  3. Heat up a large flat non-stick pan (ideally a crepe pan, but a frying pan does the job too) on medium-high heat. 
  4. Carefully wipe the whole pan with a paper towel on which you have poured a little bit of high-heat resistant oil, such as sunflower oil.
  5. Once the pan is hot, pour one laddle of batter in the center of the pan and quickly tilt the pan in a circular motion to cover the whole pan with batter. (The first crepe never looks good...)
  6. When the edges of the crepe start lifting up or change color (it should take a minute or less), flip the crepe with a long spatula. Cook the second side for another 20 seconds to one minute.
  7. Stack the crepes on a plate, or eat them as soon as they are ready.
I gave some filling ideas in this earlier post.


In the mood for brunch

Eggs à la coque are so simply delicious! Click here for the recipe.


Kale pesto tomato tart

The other day we made a delicious kale and walnut pesto based on this recipe by Shutterbean. We ate about half of it with fresh pasta (yum!), and used the other half for this tomato tart.


I used my beloved quiche crust recipe, but used whole wheat flour instead of all-purpose, and replaced the cream with water. Actually, I had made the dough in advance (I double or triple the proportions then divide the dough into small balls and freeze them), so I just had to unfreeze a ball of dough (20 seconds in the microwave), roll it out on parchment paper and voilà. I poked a few holes in the crust with a fork to let air go through and prevent the crust from bubbling up while baking, spread the kale pesto evenly, then laid thin tomato slices in concentric circles, starting from the edge of the dish. I sprinkled with a little salt and pepper, then baked at 350ºF (180ºC) for about 30 minutes.

Torn cabbage with red fermented beancurd 腐乳手撕包菜

I have no time to post any recipes lately, life was hectic I was working 6 - 7 days a week.  This blog has been neglected hopefully you did not miss me much :).

Today's recipe is vegetarian, a cheap and cheerful stir fried cabbage with a rather unusual sauce. The secret ingredient is fermented red beancurd or hong fu ru 红腐乳. This recipe looks Sichuanese but I am quite sure it is from Beijing.

Warm Green Bean Salad


Last week I listened to an interview of Alice Waters on NPR (by Terry Gross on Fresh Air). It was so inspiring that it got me dreaming about opening a place of my own all over again. (This is a recurring fantasy... which shouldn't surprise you too much). I spent last night in my Dream Café, welcoming patrons with delicious yet simple, healthy, affordable food made from the freshest ingredients, presented in a short, ever-changing seasonal menu, and featuring a fun selection of small plates for children, and a place for them to quietly play and read after their meal, so grown ups can have a few minutes of respite. Sigh...

As I was listening to Alice, two thougts came to mind. First, she mentioned that she stopped seeing her friends when she got into the chaos of opening Chez Panisse. She also said that she stopped cooking there when she had her daughter... So this dream business of mine sounded quite incompatible with my dream life of the moment. Unless maybe I could have a cafe that required work only from 9 to 5 week days (i.e. preschool hours)? Sigh... My second thought, which alleviated my disillusion, was that as far as focusing on the quality of ingredients, I was definitely, albeit modestly, following Alice's path. Nothing is more pleasurable to me than eating vegetables and fruits (and meats and fish) that taste like themselves. In her interview, Alice said that finding the ingredients was 85% of cooking, and that the Bowl of Fruit was the item she was the most proud of on her menu. I found that comment truely admirable.

All this got me thinking about the vegetables that my family used to grow in France. We didn't have a garden, but my grandparents and several uncles and aunts did. All were growing, among many other delicious plants, green beans. I don't know if green beans are still in fashion in France's vegetable gardens. They certainly were 20 years ago. The kind that my family grew was what is called "haricots verts" in the US: small, thin, dark green beans, which are both firm and juicy and barely require any cooking at all. Just a few minutes of steaming or boiling in salted water, then you can eat them warm with a piece of melting butter on top. This is how we ate them most of the time—and they rarely made it to the table: we would snack on them as soon as they were ready. Another favorite was to add boiled potatoes to the beans and season either with butter (and decorate with lemon wedges) or vinaigrette dressing.

Summer is nearly over but I found organic green beans last Saturday, so there is still time to try out this recipe, which I prepared a month or two ago. As a matter of fact, I will receive filet beans (another name for haricots verts) in my CSA box tomorrow.

Serves 4–5
  • 1 lb green beans (preferrably thin, tender ones)
  • 8–10 small potatoes (about 1 lb). New potatoes of any variety, or small Yukon Gold for example. I prefer silky rather than starchy potatoes, but both make great warm salads.
  • 1 small shallot

Dressing:
  • 1 1/2 Tbsp old-style Dijon mustard (with whole grains), or regular Dijon mustard (Try to find a French brand, such as Maille or Amora, for a more authentic taste.)
  • 1 Tbsp Jerez vinegar (sherry vinegar from Spain), or regular red wine vinegar
  • 2 Tbsp sunflower oil, or other mild-tasting oil
  • 2 Tbsp olive oil (Try to find oil made with olives from only one country1—e.g. Greece or Italy—, extra-virgin, cold pressed)
  • salt and freshly ground black pepper

Start with the potatoes: peel them and boil them in salted water until cooked but still firm (stop cooking as soon as a knife can go through easily), about 15 minutes.

Hull the beans2 (unless they are very thin) by carefully snapping each end and pulling the string that runs along the bean (which is only a problem in more mature beans). Rinse the beans.

While the potatoes are cooking, prepare the dressing. Place all the ingredients in a small sealable container3. Close tighly with a leak-proof lid. Shake well until homogeneous.

Thinly chop the shallot and place at the bottom of a large salad bowl.

As soon as the potatoes are cooked through, drain them and place them in the salad bowl. Pour 2 or 3 Tbsp dressing on them and toss. The warm potatoes will absorb the oil and flavors of the dressing and shallot.

Steam or boil the green beans in salted water for no more than 5 minutes in a pressure cooker. They must be firm but not crunchy, soft but not floppy. They loose the brightness of their green color without really tarnishing...

Drain the beans and add to the salad bowl. Pour a couple more Tbsp dressing if all has been absorbed by the potatoes. Toss gently (avoid breaking the beans).

Serve immediately.


1 To me it's an indication that it was made in smaller, maybe more artisanal batches. But I don't know for sure. And the taste should be more distinct (unique to the country of origin) than if olives are mixed.

2 This is a social time in a French kitchen—at least it is in my family. Everyone grabs a few handfuls of beans to hull and chats around the kitchen table.

3 I use a recycled jam jar. If there is any left-over dressing, I just put the jar in the fridge. If there is very little left in the jar, I still keep it (French mustard is expensive over here!) and add more ingredients (in the quantities listed above) in the jar next time I need dressing.

Plum cake


My pear cake recipe (here) works well with other fruits. Tonight, my daughter and I made a plum version of this cake with the following proportions:

  • 5 ripe plums

  • 4 eggs

  • 180g (less than 1 cup) sugar

  • 1 stick (114g) butter

  • 170g (about 1 1/3 cups) flour

  • 1 tsp baking powder

  • 1 tsp vanilla extract

  • 1/2 tsp ground cinnamon


We beat the eggs and sugar until foamy. We added the melted butter, then the sifted flour, then the baking powder, vanilla extract, and cinnamon, mixing well (with a whisk) while adding each ingredient.
We poured the dough in a buttered, round metal pan (the same old 10" x 2" I used in the pear cake recipe).
We placed the plums, halved and pitted, on the dough, cut side up.
We baked for about 50 minutes in a  340ºF oven.

Green Curry Paste (Krueang Gaeng Keow Wan)


Thai Translation – Krueang = Paste, Gaeng = Curry, Keow Wan= Green

Green curry is a favourite Thai dish of many people around the world. It is a smooth, creamy soup-like curry that can be made with any type of meat, seafood or vegetarian versions. This curry paste is made without shrimp paste making it perfect for vegans or vegetarians to enjoy. If you do not like your curries too spicy add large green chilli's which are not particularly spicy, alternatively, use more small green chilli's if you like dishes that pack a punch!

Store excess curry paste in a sealed container in the fridge for up to 2 weeks. Use the paste as an additive to fried rice for a delicious and quick meal or marinate meat or tofu in the paste and then grill it on the bbq for something a little different. If you do not have a mortar and pestle, you can make this paste quickly and easily using a hand-held blender or in a food processor. 

Preparation Time - 15 minutes

Makes 3 tablespoons

Ingredients
10 medium green chilli
5 small green chilli
½ inch piece turmeric
1 small red onion or 3 small spring onions
2 coriander seeds
2 kaffir lime leaves
1 inch piece galangal
1 piece lemongrass
2 tsp shredded ginseng


Method
  1. In a mortar and pestle, pound the coriander seeds until they are a fine powder.
  2. Add the kaffir lime leaves that have been stripped from the stems and pound to a paste. 
  3. Add the remaining ingredients and pound until they form a smooth paste.

Stir Fried Tofu with Basil (Pad Krapow To Hu)


Thai Translation - Pad = Stir Fried, Krapow = Holy Basil, To Hu

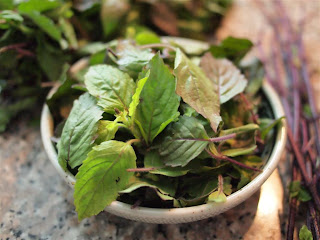
Pad Krapow is a very popular and full flavoured dish that usually is made with pork or chicken. It has a uniue earthy flavour but can also be very spicy. In this version, I made it using tofu, cauliflower and mushrooms which makes it very nutritious and delicious too! The key ingredient to Pad Krapow is krapow – or holy basil. Holy basil can be substituted for regular Italian basil but it wont have the same earthy taste to the dish. You should be able to find holy basil in some supermarkets or specialty Asian grocery stores and it can be identified by the woody stems and slightly furry leaves.

Cooking Time – 15 minutes
Preparation Time – 10 minutes

Serves 2

Ingredients
150g block firm tofu
100g oyster or straw mushrooms
100g cauliflower
1 bunch holy basil
4 small red chilli's
4 cloves garlic
2 tsp palm sugar
1 tbsp soy sauce
2 tbsp mushroom oyster sauce
1 tsp white pepper
2 tbsp vegetable oil
1/3 cup water

Method
  1. Finely chop your tofu into centimeter sized pieces and fry in 1 tbsp vegetable oil until beginning to brown. Remove from heat and drain on paper towels.
  2. Chop your mushrooms and cauliflower into pieces around the same size as the tofu, mince your garlic and chilli and remove the basil leaves from the stems.
  3. Heat the remaining oil over medium heat and quick fry a handful of the basil leaves for approximately 1-2 minutes. Remove from oil and drain on paper towel.
  4. In the remaining oil, fry your garlic and chilli for 1-2 minutes. Add your cauliflower and tofu and cook for a few minutes. Add your soy sauce, palm sugar and mushroom oyster sauce and mushrooms. Mix well to combine. Add the water and cook for 3 minutes.
  5. Stir through the basil that hasn't been crisped and remove from heat.
  6. Serve dish with a side of rice and a sprinkle of crispy basil.

Satay Sauce


Satay sauce is a creamy and nutty sauce that goes very well with grilled meats. It is highly addictive, tastes great on its own and is ridiculously easy to make. You wont ever buy a store-made version of this sauce again!


Ingredients
1/3 cup peanut butter
½ cup coconut milk
2 garlic cloves
2 – 4 medium chilli's
2 tsp soy sauce
1 tbsp brown sugar or palm sugar
½ lime

  1. Meanwhile, finely dice the garlic and chilli's and place into a bowl. Add the soy sauce and sugar. Stir well to combine. Add the peanut butter and mix well.
  2. Add the coconut milk to the peanut mix and carefully combine them, stirring well. This may take a few minutes for the milk and peanut to mix.